Love this? Save it for later!
Share the inspiration with your friends
“You really don’t need to buy bagels anymore,” my friend texted me one Saturday morning. She’d just whipped up a batch of homemade bagels after a long week of takeout and endless Zoom calls. Honestly, I was skeptical. Bagels seemed like one of those bakery items too fancy to tackle at home—dense, chewy, perfectly glossy on the outside, and fluffy inside. But, well, curiosity got the best of me.
That same afternoon, I pulled out my mixing bowl, flour, yeast, and a couple of pantry staples. The process was surprisingly straightforward. I remember the dough feeling just right after a few gentle kneads—springy but not sticky. When I boiled those dough rounds and then baked them, the kitchen filled with this warm, yeasty aroma that made me pause. The crust had that shiny, golden hue I always admired in store-bought bagels, and the bite? Oh, that chewy, tender bite that makes you want to savor every mouthful.
What caught me off guard was how forgiving the recipe was. I made a batch that weekend, then another midweek, tweaking a little here and there. I even convinced a couple of neighbors to try some, and they asked for the recipe. It stuck with me because it’s that kind of recipe you don’t just make once—you make it a go-to, the one you pull out when you want that perfect bagel fix without the fuss of a trip to the bakery.
There’s something quietly satisfying about shaping the dough by hand, watching it rise, boiling it, and knowing you’re about to eat something fresh, homemade, and deliciously chewy. It’s a small, comforting ritual that turns a simple morning into a little celebration. And if you’re wondering whether homemade bagels can really be that soft and chewy, well, this recipe might just change your mind.
So, here’s my easy chewy homemade bagels recipe—the one that became a quiet weekend obsession and a surprisingly simple way to make your mornings better.
Why You’ll Love This Recipe
After testing countless bagel recipes, this one stands out because it balances ease with authentic texture and flavor. It’s the kind of recipe that fits into busy schedules without cutting corners on taste or chewiness.
- Quick & Easy: Ready in about 2 hours, including rising and baking—perfect for weekend mornings or leisurely afternoons.
- Simple Ingredients: No need for specialty flours or additives; just your basic pantry staples like bread flour, yeast, and a bit of malt syrup or honey.
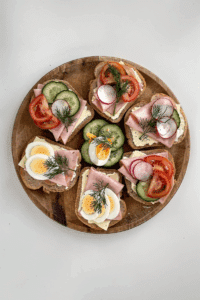
- Perfect for Brunch or Snack: These bagels shine whether toasted with cream cheese, piled high with smoked salmon, or enjoyed plain with butter.
- Crowd-Pleaser: I’ve never met a kid or adult who didn’t love the chewy texture and subtle sweetness of these bagels.
- Unbelievably Delicious: The boiling step locks in moisture, creating that classic shiny crust and chewy crumb you expect from a great bagel.
What makes this recipe different? It’s the straightforward technique combined with small tweaks—like a splash of malt syrup in the boiling water and a longer fermentation—that gives the bagels their signature chew and flavor depth. I learned through trial and error that a softer dough yields a tender bite, but boiling is non-negotiable for the perfect crust. Plus, shaping the dough into neat rounds is oddly satisfying and easier than you think.
This isn’t just another bagel recipe—it’s the one you’ll keep coming back to, the one that feels like a warm hug in carb form. Honestly, after the first bite, you might just close your eyes and savor the moment.
What Ingredients You Will Need
This recipe uses simple, wholesome ingredients to deliver that bold flavor and chewy texture without fuss. Most of these are pantry staples, and you can swap a few if needed.
- Bread Flour: 4 cups (480g) for the best chewiness (King Arthur or Bob’s Red Mill recommended)
- Warm Water: 1 ½ cups (360ml) around 105°F (40°C) to activate the yeast gently
- Active Dry Yeast: 2 ¼ tsp (one packet), make sure it’s fresh for good rise
- Sugar: 1 tbsp; helps yeast feed and adds slight sweetness
- Salt: 2 tsp, balances flavor
- Malt Syrup or Honey: 2 tbsp in dough for that classic bagel sweetness and slight tang (optional but recommended)
- Barley Malt Syrup or Honey for Boiling Water: 2 tbsp to add shine and flavor to crust
- Egg Wash: 1 egg beaten with 1 tbsp water for brushing the tops before baking
- Toppings (Optional): Poppy seeds, sesame seeds, everything bagel seasoning, coarse salt
If you don’t have malt syrup, honey works fine in both the dough and boiling water. For a gluten-free twist, you can try a blend of gluten-free flour but expect a different texture. Using high-protein bread flour is key here because it gives the bagels their signature chew.
Equipment Needed
- Large Mixing Bowl: For combining and kneading the dough; a sturdy glass or stainless steel bowl works well.
- Stand Mixer with Dough Hook (Optional): Speeds up kneading, but hand kneading is just as effective and even therapeutic.
- Baking Sheet: For baking the bagels; line with parchment paper or a silicone mat to prevent sticking.
- Large Pot: Needed for boiling the bagels before baking; make sure it’s big enough to hold a few bagels comfortably without crowding.
- Slotted Spoon or Spider Strainer: To lift bagels out of boiling water without breaking them.
- Cooling Rack: To cool bagels evenly and keep crust crisp.
If you don’t have a stand mixer, no worries! I often knead by hand, which takes about 8-10 minutes but lets you feel the dough’s consistency perfectly. Also, a kitchen thermometer helps check water temperature, but if you don’t have one, warm water should feel like a very warm bath—not hot enough to burn your finger.
Preparation Method

- Activate the Yeast: In a small bowl, combine warm water (1 ½ cups/360ml), sugar (1 tbsp), and yeast (2 ¼ tsp). Let it sit for 5-10 minutes until foamy and bubbly. If it doesn’t foam, your yeast might be dead—start over with fresh yeast.
- Mix the Dough: In a large bowl, whisk together bread flour (4 cups/480g), salt (2 tsp), and malt syrup or honey (2 tbsp). Pour in the activated yeast mixture and stir with a wooden spoon until a rough dough forms.
- Knead the Dough: Turn the dough onto a floured surface. Knead for 8-10 minutes until smooth and elastic. The dough should be slightly tacky but not sticky—add small flour amounts as needed. (If using a stand mixer, knead with the dough hook on medium speed for about 6-7 minutes.)
- First Rise: Shape the dough into a ball and place it in a lightly oiled bowl, turning once to coat. Cover with a damp towel or plastic wrap. Let it rise in a warm spot for 1 to 1 ½ hours until doubled in size.
- Shape the Bagels: Punch down the dough and divide it into 8 equal pieces (about 115g or 4 oz each). Roll each piece into a smooth ball. To shape, poke a hole through the center with your thumb and gently stretch it to about 2-3 inches (5-7cm) diameter. Let shaped bagels rest on a floured surface for 10 minutes.
- Preheat Oven & Prepare Boiling Water: Preheat your oven to 425°F (220°C). Fill a large pot with water, add 2 tbsp barley malt syrup or honey, and bring to a gentle boil.
- Boil the Bagels: Using a slotted spoon, gently lower 2-3 bagels at a time into boiling water. Boil for 1 minute per side (total 2 minutes). Remove and place on a parchment-lined baking sheet. Repeat with remaining bagels.
- Apply Egg Wash & Add Toppings: Brush each boiled bagel with egg wash (1 beaten egg + 1 tbsp water). Sprinkle toppings if desired.
- Bake: Bake in the preheated oven for 20-25 minutes until golden brown and shiny. Rotate the pan halfway through for even baking.
- Cool: Transfer bagels to a wire rack to cool completely before slicing. Enjoy warm or toasted!
Tip: If your bagels brown too quickly, tent loosely with foil during the last 10 minutes. The boiling step ensures the bagels puff up and develop that chewy crust, so don’t skip it!
Cooking Tips & Techniques
Getting that perfect chewy bagel texture is all about controlling moisture and gluten development. Kneading well develops gluten, giving structure and chew. I’ve learned the hard way that under-kneaded dough can lead to dense bagels, while over-flouring makes them dry.
Boiling the dough rings is a step many skip—but it’s the secret to the shiny crust and chewy bite. Adding malt syrup or honey to the water adds subtle sweetness and encourages that iconic glossy finish. If you don’t have malt syrup, honey or sugar works fine.
When shaping, keep your hands lightly floured but avoid overdoing it. A gentle stretch of the hole keeps the bagel from closing up during rising and baking. Letting the shaped bagels rest before boiling helps relax the dough, preventing shrinkage.
Don’t rush the first rise; it might take a bit longer depending on your kitchen’s temperature. A good rise means lighter bagels. If your kitchen is cold, try placing the bowl near a warm spot or inside an oven with just the light on.
And one last nugget—resist the urge to slice into a hot bagel right out of the oven. Giving it time to cool locks in moisture and stops it from becoming gummy inside.
Variations & Adaptations
- Whole Wheat Bagels: Substitute half the bread flour with whole wheat flour for a nuttier flavor and denser texture.
- Cheese-Topped Bagels: Sprinkle shredded cheddar or asiago on top before baking for a savory twist that’s always a hit.
- Sweet Cinnamon Raisin: Add ½ cup raisins and 1 tsp cinnamon to the dough for a breakfast treat. Brush with butter after baking and sprinkle with cinnamon sugar.
- Gluten-Free Option: Use a gluten-free flour blend designed for bread. Note: the texture will be different but still tasty.
- Alternative Cooking Method: For a slightly different texture, try baking the bagels without boiling—just brush with egg wash and bake. Chewiness will be less but still enjoyable.
I once made a batch with garlic and herb seasoning mixed into the dough—those disappeared in minutes at a neighborhood picnic. Experiment with your favorite flavors and toppings to make this recipe your own.
Serving & Storage Suggestions
These bagels are best enjoyed fresh and warm, sliced and toasted with cream cheese or butter. They also make phenomenal sandwiches with smoked salmon, avocado, or deli meats.
To store, keep bagels in an airtight container or sealed plastic bag at room temperature for up to 2 days. For longer storage, freeze whole bagels or slices in freezer bags for up to 3 months. When ready to eat, thaw at room temperature and toast to refresh that chewy crust.
Reheating in a toaster oven or regular toaster works best—microwaving tends to make them chewy but slightly rubbery. Over time, bagels develop a richer flavor, especially if you wrap them tightly and let them rest overnight in the fridge before toasting.
Nutritional Information & Benefits
One homemade bagel (about 115g) contains roughly:
| Calories | 280-320 |
|---|---|
| Carbohydrates | 56g |
| Protein | 10g |
| Fat | 2-3g |
| Fiber | 2-3g (higher if using whole wheat) |
Using bread flour provides good protein content, which helps with chewiness and satiety. Malt syrup and honey add natural sweetness without refined sugars. For those watching carbs, you can try using almond flour blends, though texture changes.
Allergen note: This recipe contains gluten, wheat, and eggs (used in egg wash). For an egg-free option, brush with water or non-dairy milk before baking. The recipe fits well into balanced diets when portioned mindfully.
Conclusion
Making your own bagels at home might sound intimidating, but this easy chewy homemade bagels recipe proves it’s not only doable but downright satisfying. With a handful of simple ingredients and a little patience, you get that perfect soft inside and chewy crust every time.
Feel free to tweak the recipe to suit your tastes—whether that’s adding seeds, mixing in flavors, or trying whole wheat flour. I love this recipe because it turns an ordinary morning into a small, delicious ritual, and it’s just so rewarding to share fresh homemade bagels with friends or family.
Give it a try, and don’t be surprised if you find yourself making these bagels more often than you expected. I’d love to hear how yours turn out or what unique spins you put on them—drop a comment or share your favorite topping ideas!
Frequently Asked Questions
Can I use all-purpose flour instead of bread flour?
Yes, but bread flour is preferred for its higher protein content, which creates that classic chewy texture. All-purpose flour will work but may yield softer, less chewy bagels.
Why do bagels need to be boiled before baking?
Boiling sets the crust and creates the dense, chewy texture that bagels are known for. It also helps develop a shiny, golden crust during baking.
How long can homemade bagels be stored?
At room temperature, bagels stay fresh for about 2 days. For longer storage, freeze them for up to 3 months in airtight bags.
Can I make bagels without an egg wash?
Yes, you can brush the bagels with water or milk to help toppings stick. Egg wash gives a shiny, golden finish but is optional.
What’s the best way to shape bagels?
Roll dough balls, poke a hole with your thumb, and gently stretch the hole to about 2-3 inches. Let them rest before boiling to avoid shrinking.
Pin This Recipe!

Easy Chewy Homemade Bagels

A straightforward recipe for homemade bagels that are soft inside with a chewy crust, perfect for brunch or snacks. This recipe uses simple pantry staples and includes tips for perfect texture and flavor.
- Prep Time: 20 minutes
- Cook Time: 25 minutes
- Total Time: 1 hour 45 minutes
- Yield: 8 bagels 1x
- Category: Breakfast, Snack
- Cuisine: American
Ingredients
- 4 cups (480g) bread flour
- 1 ½ cups (360ml) warm water (around 105°F / 40°C)
- 2 ¼ tsp active dry yeast (one packet)
- 1 tbsp sugar
- 2 tsp salt
- 2 tbsp malt syrup or honey (for dough)
- 2 tbsp barley malt syrup or honey (for boiling water)
- 1 egg beaten with 1 tbsp water (egg wash)
- Optional toppings: poppy seeds, sesame seeds, everything bagel seasoning, coarse salt
Instructions
- Activate the yeast by combining warm water, sugar, and yeast in a small bowl. Let sit for 5-10 minutes until foamy.
- In a large bowl, whisk together bread flour, salt, and malt syrup or honey. Pour in the activated yeast mixture and stir until a rough dough forms.
- Turn dough onto a floured surface and knead for 8-10 minutes until smooth and elastic. Alternatively, knead with a stand mixer dough hook on medium speed for 6-7 minutes.
- Shape dough into a ball and place in a lightly oiled bowl. Cover and let rise in a warm spot for 1 to 1 ½ hours until doubled in size.
- Punch down dough and divide into 8 equal pieces (about 4 oz or 115g each). Roll each into a smooth ball, poke a hole through the center with your thumb, and stretch to 2-3 inches diameter. Let rest on floured surface for 10 minutes.
- Preheat oven to 425°F (220°C). Fill a large pot with water, add barley malt syrup or honey, and bring to a gentle boil.
- Boil 2-3 bagels at a time for 1 minute per side (2 minutes total). Remove with slotted spoon and place on parchment-lined baking sheet.
- Brush each bagel with egg wash and sprinkle toppings if desired.
- Bake for 20-25 minutes until golden brown and shiny, rotating pan halfway through.
- Cool on a wire rack before slicing. Enjoy warm or toasted.
Notes
Use bread flour for best chewiness. Boiling the bagels is essential for the classic chewy crust and shiny finish. If bagels brown too quickly, tent with foil during the last 10 minutes of baking. Let bagels cool completely before slicing to avoid gummy texture. Egg wash is optional but gives a shiny golden crust. For gluten-free, use a gluten-free flour blend but expect different texture.
Nutrition
- Serving Size: 1 bagel (about 4 oz
- Calories: 280320
- Fat: 23
- Carbohydrates: 56
- Fiber: 23
- Protein: 10
Keywords: bagels, homemade bagels, chewy bagels, easy bagel recipe, breakfast, brunch, baking